This post contains affiliate links. See my affiliate disclaimer here.
Hi there! Since you are here I have to congratulate you on taking your first steps to start a blog and becoming a blogger. High-5! You have made an EXCELLENT choice and you won’t regret it, whether you want to become a full-time blogger or only blog part-time. Here you will learn how to start a successful blog.
Before you start your blog you should know what you are going to blog about. This might influence the domain name you choose. I blog about various topics such as food, organization, decor, health, and blogging. So it is not necessary to only have one specific niche, but it is totally up to you.
Once you have an idea of what your blog will be about, you can actually start your blog. The first step to this is to get hosting.
In this post, I will show you step-by-step instructions on how to start your blog with Bluehost – even if you are not tech savvy!
Want to start your blog today? Click here to start your successful blog for $3.95 per month + get a free domain.
There are of course a ton of free hosts available out there, but trust me when I say that free hosting is not the way to go.
- You’ll miss out on tons of monetization opportunities (you won’t be able to show ads!)
- Your blog will be slower
- It doesn’t look professional
So why am I recommending Bluehost?
Well Bluehost is cheap. They offer 24/7 support. You get a FREE domain. AND there is a 30 day back guarantee.
So, are you ready to learn how to start a successful blog? Let’s go!
Step 1 – Sign up for hosting
You can join Bluehost by clicking HERE. Okay, so this is the first major step to having an awesome blog. Every blog and website on the internet needs to have a host. It is a way to make your blog accessible on the internet.
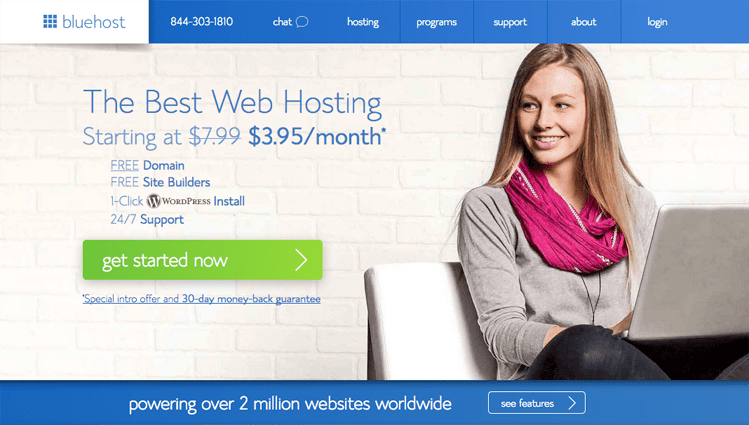
To get started click the big green “get started now” button.
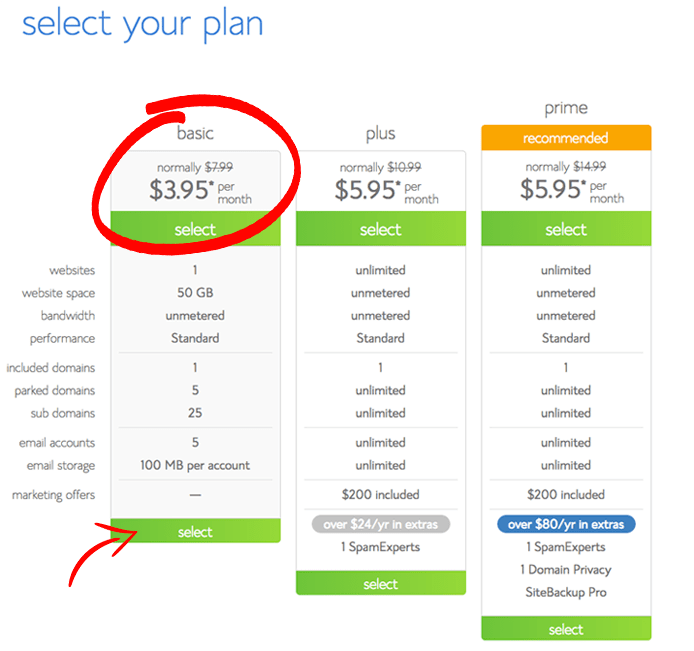
Next, you have to select the type of plan you want. I recommend the basic plan since it has everything you need.
Step 2 – Choose your domain name
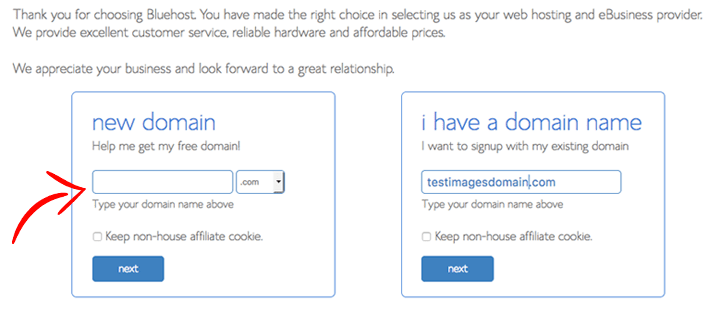
After you have chosen the basic plan, it is time to choose your domain name. A domain name is your web address. Mine is channygans.com.
Choosing a domain name can be a bit intimidating for some, especially if the one you want is already taken. But guys, it really doesn’t have to be a stressful process. Make a list of a few domain names that you really like (something catchy or even your name), this way you can move down your list if your first choice is unavailable.
Enter your domain name under “new domain” and click next to see if it is available. If the domain name is not available, Bluehost will inform you. If it is available you will proceed to the next step.
Step 3 – Fill out your details
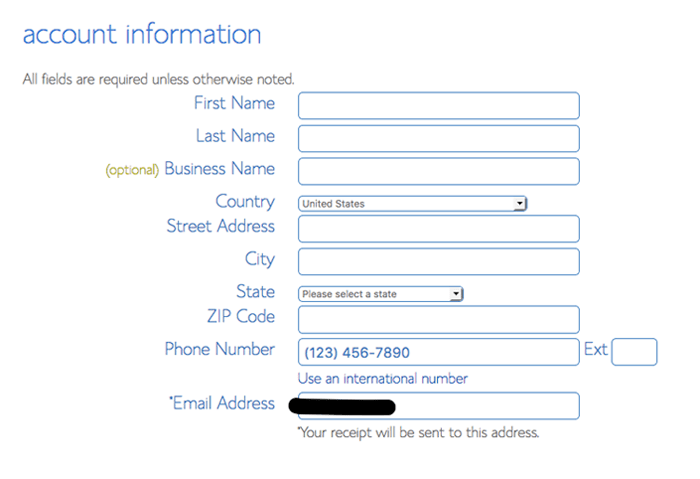
Now you will need to enter all of your personal details in order to create your account.
The email that you enter here should be the main email that you use for your blog; this is the email you will use to sign in.
Step 4 – Select the correct package
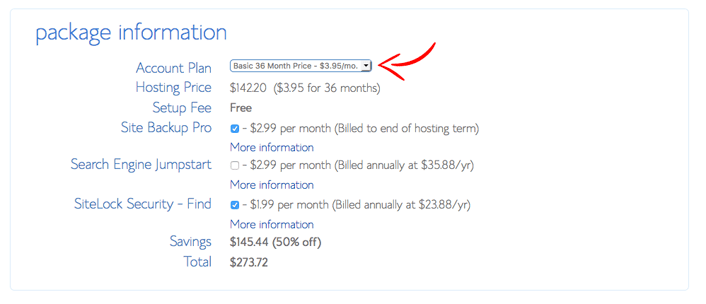
After you fill out all of your personal information you will want to make sure that the correct package is selected.
So first up select your account plan. The 36-month package is the way to go since it offers the best value. You will have to pay for the 36 months up front. This is great since you won’t have to worry about renewing it every year. Remember that you can cancel after 30 days and get your money back if you are not happy. So you really have nothing to lose.
You also have some optional add-ons available, which will be added to your fee if you select them. You can uncheck all of them BUT I do recommend that you select the “Domain Privacy Protection” option.
The domain privacy feature keeps your personal contact information private. You can read more here.
Step 5 – Billing information and password creation
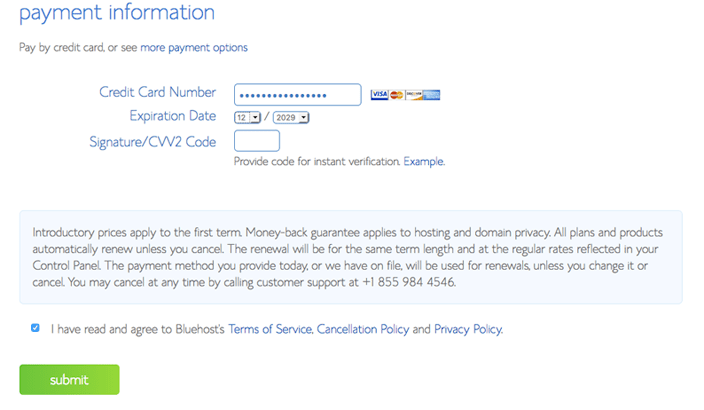
You can now add your billing information and confirm that you’ve read all of the fine prints. Once you’re done, click on submit.
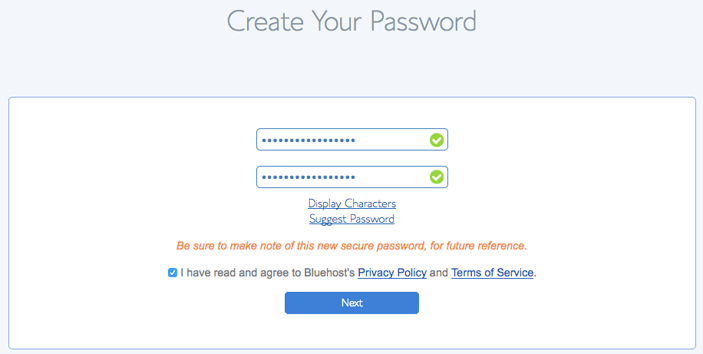
Once that’s done you have to create a password for your account. Simply click on “Create your password” to get started. See below.
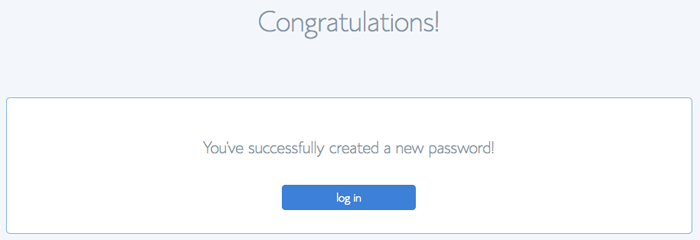
Once your password is created successfully you will see the congratulations page. You can now log in with the email you used to create the account and the password you just created.
Step 6 – Get started with WordPress
Now you can actually get started with WordPress. Bluehost makes this super easy.
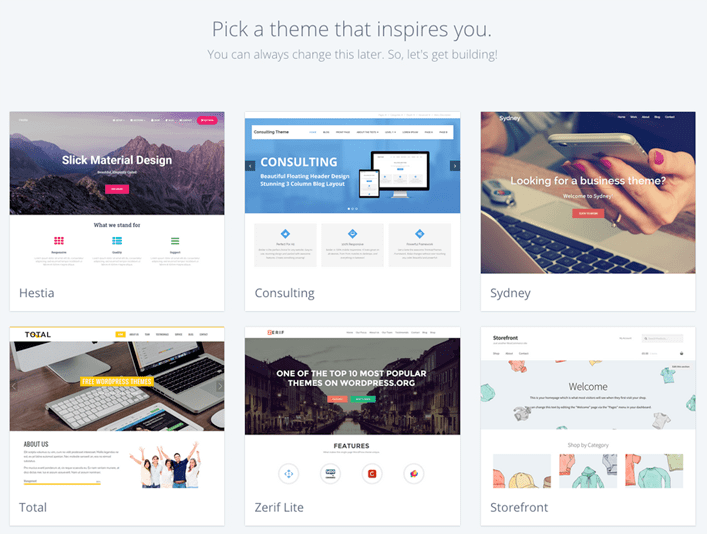
First, you will need to pick a theme. You will see a screen that looks like this:
Although I do recommend that you get a paid theme, you can pick any of these free themes for now. You can always change it later so don’t worry.
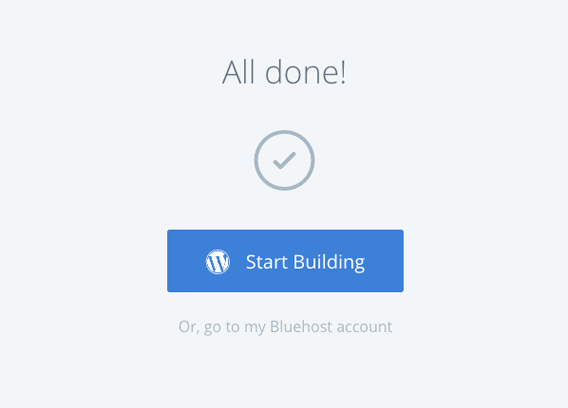
Once you have chosen your theme your screen should look like this:
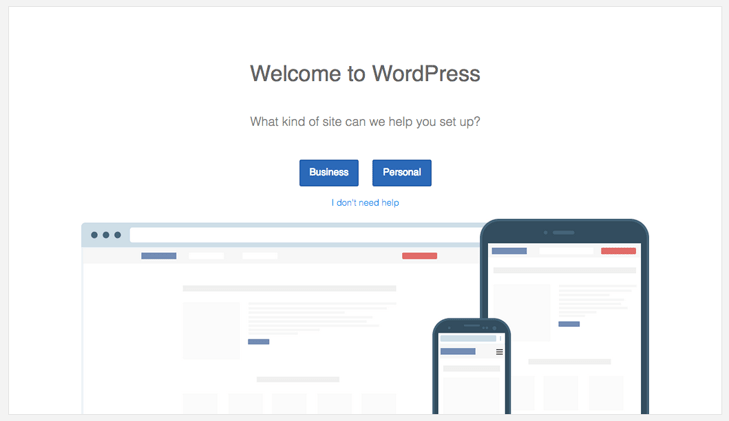
You can go ahead and click on the “Start Building” button, which will take you to a screen that looks like this:
Here you can choose either business or personal to be taken to the next screen. You can choose business even if you don’t have a business yet.
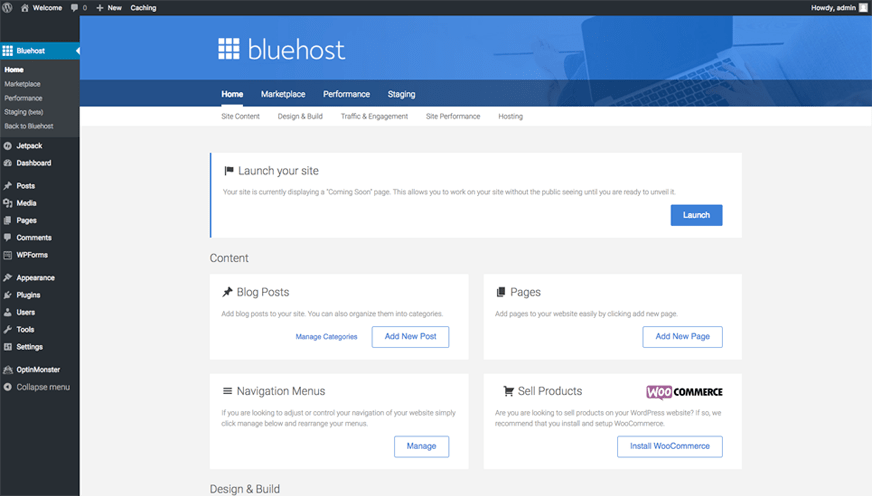
After you’ve selected either business or personal you should see a page that looks like this:
From here you can start creating pages and posts for your blog. You can do this before or after you launch your blog, but for the sake of this tutorial, I will include steps to launch your blog.
So go ahead and click on the button that says “Launch”
Step 7 – Launch your blog
If you skip this step for now, your blog will display a “Coming Soon” page. I do recommend that you first get your site ready (theme, pages, and posts) before you launch.
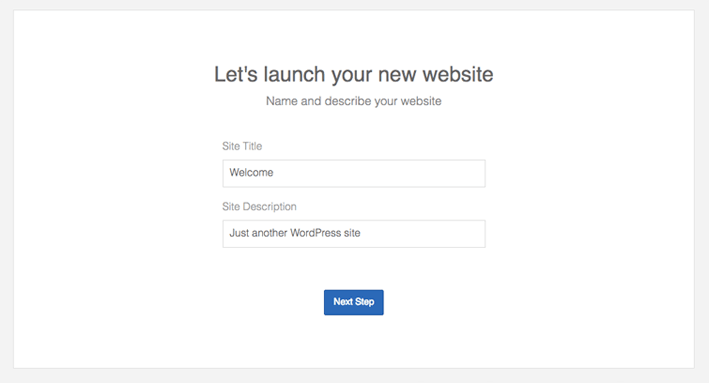
After you clicked the launch button you will be prompted to enter your site title and site description.
The site title will typically be your domain name or blog name (e.g. Channygans) and the site description should describe what your blog is about (this should only be a few words).
After you have filled in all of the details you can go ahead and click on “Next Step”. And you’re done! Congratulations, you now have your very own self-hosted blog.
Alright, so you have your blog, now what?
- Choose a theme you like
- Start creating pages and posts for your blog if you haven’t already
- Promote your posts on Pinterest
- Connect with other bloggers
1 – Choose a theme you like
What your blog looks like is actually important. You should treat your blog like a business, and a business is supposed to be professional.
I highly recommend that you get a paid theme since they are generally a lot more customizable than a free one.
If you don’t have enough funds to get a paid theme yet you can totally use a free theme. You should just be careful to not just download any random theme you find on the internet though. ALWAYS use free themes that are listed in the official WordPress directory.
A paid theme is generally better and offers more than a free theme ever could. Paid themes:
- offer support
- have updates
- are more customizable
- are way more unique
So my first point remains – treat your blog like a professional business and go for a paid theme.
2 – Create pages & posts
One important page you NEED to have is your “About” page. Your about me page lets your readers know who you are, what your blog is about, and how reading your blog will benefit them.
You should also have a “Contact” page where you either have a contact form, state ways how people can contact you, or both. A contact page is also important to have since it makes it easier for other bloggers to contact you for sponsored posts or collaborations.
3 – Promote your posts on Pinterest
Pinterest is a GREAT way to get traffic to your blog. You need to set up a business Pinterest account if you haven’t already. If you don’t want to start a new Pinterest account you can convert your personal account into a business account.
Once you have your business account you should create boards that relate to all the topics you cover on your blog. You can also create one main board for all of your pins, mine is titled Channygans – The best of. You should also join group boards, which is kind of like a community board, where a lot of people can share their pins.
Now you can start saving pins to the new boards you created. Start out by pinning pins that have a high repin rate.
You can easily create your own pins on Canva.com. That is what I use and I love it. You can check out my Pinterest account and have a look at my pins.
Share your pins on group boards and your own boards.
4 – Connect with other bloggers
It is super important to connect with other bloggers in your niche. You can connect with other bloggers by leaving them comments on their posts, reaching out to them on their blog Facebook pages or even by sending them an email.
Why should you make blogger friends? Well, you want people to actually interact with your blog. They can help you stay inspired. You can help each other out.
The most important thing about blogging though is that you SHOULD NOT GIVE UP! You WILL succeed if you give it your all!
If you have any questions about how to start a successful blog please feel free to leave them in the comments and I will get back to you as soon as I can.

Awesome guide for starting a new blog from scratch! I completely agree that Bluehost makes the process really easy and would also recommend them. You don’t need to know any technical stuff to get started and its also really affordable.